Most home safe installation fails before the safe comes out of the box. In 25 years of locksmithing in Boise I have opened safes bolted to a closet shelf with two drywall screws, safes sitting loose on carpet with a keypad standing in for security, and one between-studs wall safe that came out of the drywall the first time the owner yanked the door open. Home safe installation is not a product problem. It is a mounting problem, and it is a lock problem, in that order.
Here is the short version of what I have learned: the box matters less than how it is anchored, and the anchoring matters less than the lock on the front. A modest safe lag-bolted into two studs beats a heavy safe sitting on a closet floor, because a thief with a dolly does not care what you paid.
What follows is the order I actually work in. Name the threat, pick the location, frame and anchor, then set up the lock and test it. I will also show the two safes I would start a first-time buyer with for the two most common household jobs: a hidden wall unit, and a freestanding fire-rated safe for a home office.
Why you should trust me
I have been a locksmith since the mid-1990s. Most of my week is residential lock work, but a steady slice of it is safe work: installations, service calls, and the phone call where someone needs a safe opened because the keypad died or the code was never changed from the factory default. I keep a workshop notebook of which locks fail under which tools.
My bias is simple. The lock is the safe. A steel box with a cheap lock is a steel box with a suggestion on the front. I care about the door gap, the bolt work, and whether a fire rating has a real test behind it. I do not use the phrase burglar-proof, because nothing is burglar-proof.
How I picked and how I tested
I judge every safe on four questions before it earns a recommendation.
One, what is the lock? Mechanical dial, digital keypad, or biometric. Two, how wide is the door gap and how many bolts hold the door? A crowbar looks for a gap first. Three, what does the fire rating actually say, not the sticker on the front? Four, would I trust it with documents someone cannot replace?
The two safes below are the ones I would point a first-time buyer toward for the two jobs in this guide. I have not pried either of them open, so I am not going to pretend I have test numbers for you. What I can tell you is what each one is built to do, where the weak points are likely to be, and what you should verify before you trust it with anything that matters.
The two safes I would start with
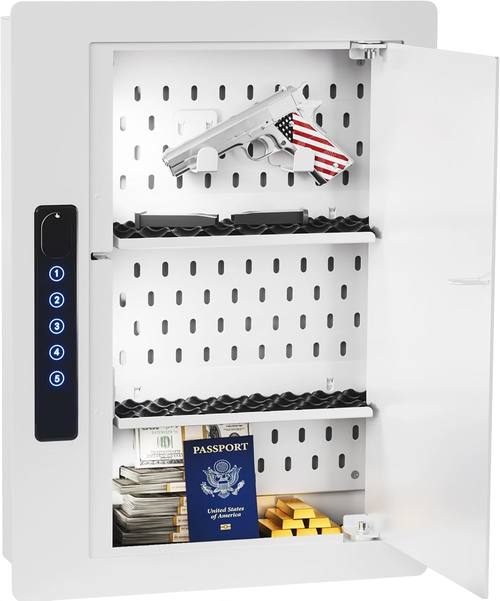
Hidden-space pick: Grimtron Hidden Wall Safe Between 16" Studs, Electronic Keypad, White
 Visit on Amazon →
A between-studs wall safe is the most underrated piece of home security on the market, and it is also the easiest to install badly. This Grimtron unit is sized for standard 16-inch on-center framing and comes in white, which matters more than people admit. A safe behind a hinged picture in a closet should not announce itself, and a white face disappears under drywall and paint.
What I like about the design is that it lives inside the cavity, so a smash-and-grab crew walking through your bedroom never sees it. What you have to verify before you cut anything is that the cavity is empty. Sixteen inches on center means roughly 14.5 inches of clear space between the faces of two studs, and that number changes if you have a doubled stud, a plumbing stack, or a junction box in the run. Open the wall carefully and look before you commit.
The electronic keypad is the honest middle ground between a dial and a fingerprint reader. It is fast enough to use daily, and it fails in a way you can plan for, which is a dead battery plus a backup key. Change the factory code the day you install it, and keep the backup key somewhere outside the house.
Flaws but not dealbreakers: A wall safe holds a binder, some jewelry, and a passport folder, and not much else. If you are picturing a box of tax records or anything long, this is the wrong shape. It also depends entirely on the framing you give it. Cut a hole in drywall, slide it in, and you have built a shelf with a lock on it.
Check current Amazon price before you commit, and measure your cavity first.
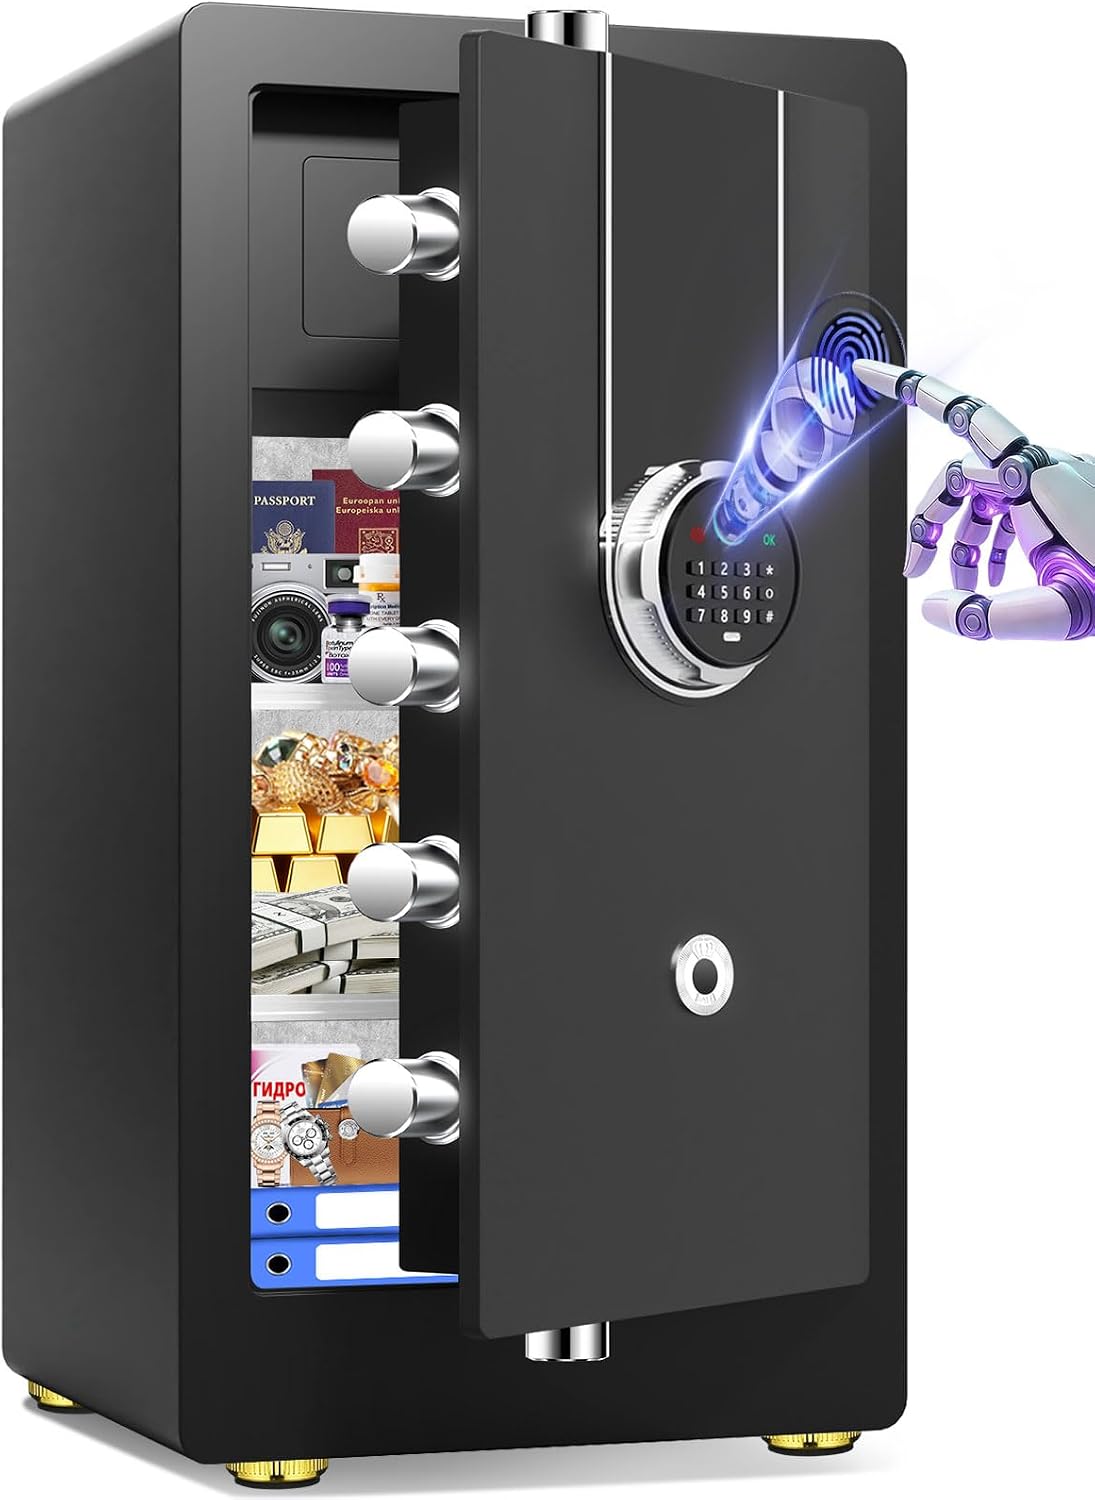
Document-and-volume pick: 8.2 Cu Ft Fireproof Biometric Safe for Home Office
 Visit on Amazon →
This is the other job: a freestanding safe with real interior volume for a home office. This much space is enough for document binders, a laptop, external drives, and a smaller fire-rated box for the things you would genuinely grieve losing. It is a floor-standing unit, which is what you want, because volume and weight are what make a safe annoying to walk off with.
The biometric lock is the part I have the most to say about. Fingerprint readers are genuinely fast, and for an office safe you open several times a day, speed is the reason people actually use a safe instead of stacking papers on a desk. The trade is that biometrics run on power. When the batteries go, the reader goes with them. Every biometric safe I have serviced had a key or a code path as a backup, and you should test that path the week you install it, not the night you need it.
Flaws but not dealbreakers: A unit this size is heavy enough to hurt your back and light enough for two people with a dolly, which means it has to be anchored. Bolting it down is not optional. Read the fire documentation carefully too. A fire rating is a measured claim, and I want the minutes and the temperature, not just the word fireproof printed on the door.
Check current Amazon price, then budget for anchors and a second set of hands.
The actual installation workflow
This is the sequence I use. It works for a wall unit and a floor unit, with one difference at step six.
Step one: name the threat. Most households face smash-and-grab, not a crew with tools and an afternoon. That means hidden beats heavy, and anchored beats expensive. Write down what you are protecting and who you are protecting it from. If the honest answer is a professional crew, no consumer safe solves that, and I would rather say so now.
Step two: pick a location that is not the obvious one. The master bedroom closet is the first place a burglar looks. A home office closet, a utility room, or a wall behind furniture in a hallway is better. Avoid anywhere that floods. A safe sitting in an inch of water in April is a bad plan no matter how good the lock is.
Step three: find the studs and verify them. A stud finder is a guess. Confirm with a thin finishing nail or a small bit at the height you plan to work. For a wall safe, confirm you have 14.5 inches of clear space between stud faces. For a floor unit, find two studs in the wall behind it as well as solid floor structure.
Step four: check the cavity for wiring and plumbing. Look for outlets, switches, and anything on the far side of the wall. A wet wall with the plumbing stack is the wrong wall. So is the wall behind the electrical panel.
Step five: cut the opening. Use a drywall saw and score a clean line. Keep the cutout piece for patching later. Cut smaller than you think you need and open it up from there, because a hole that is too big cannot be fixed with caulk.
Step six: frame it. This is the step that separates a safe from a hole. For a wall unit, add blocking above and below the opening, tie it into the studs on both sides, and get the framing square. For a floor unit you are not framing, but you are confirming the floor is solid and the wall behind it has studs you can reach.
Step seven: set it and check the door before you fasten anything. Put the safe in place, shim it level, then open and close the door a dozen times. Listen to the bolts. Watch the gap around the door. If the frame is twisted, the door gap opens on one corner, and a wide gap is an invitation.
Step eight: anchor it. Lag bolts into studs for the wall unit, with washers, at least four points. For the floor unit, anchor into the slab or into two wall studs with hardware rated for the load. Into concrete, use wedge anchors and drill the hole size the anchor calls for, not the size that feels right.
Step nine: set up the lock. Change the factory code first. Register the safe if the maker asks. Program your fingerprint, then a second finger, then a backup code. Test the key. Tape a note with the battery type inside the door so you are not guessing in two years.
Step ten: test it like a stranger would. Close the door, lock it, and try to slide the safe. Try to tip it. Push on the top corner. If it moves, the anchor failed and you fix it before anything goes inside. Do not test with a crowbar unless you are ready to buy another safe.
The lock is the safe
Three lock types, three honest answers.
A mechanical dial is the most reliable hardware you can buy. No battery, no electronics, no software. It is also slow, and people who find a lock slow stop using the safe. That is a security problem wearing a convenience costume.
A digital keypad is the middle ground and what I recommend for most households. Fast enough to use, simple enough to teach a family member, and it fails predictably. The catch is batteries. Cheap keypads eat them, and a keypad that dies at eleven at night is a keypad that gets pried.
A biometric reader is the fastest option and the one with the most failure modes: dirty fingers, cold hands, a cut thumb, and power. I run one on my own shop safe, so I am not against them. I just do not want one to be the only way in.
Whatever you choose, the rule is the same. Two ways in, and one of them is not electronic.
The competition and why it lost
Plenty of options lost this comparison before I got to the two above, and most lost on the same three things.
The hotel-style keypad lockbox lost because it is a box, not a safe. One bolt, a thin door, and a gap you can see daylight through. Fine in a rental where you are hiding a spare key from a curious guest, useless for documents.
The fireproof document bag lost because a bag protects paper from heat and does nothing about a person with hands. It belongs inside a safe, not instead of one.
The twenty-pound portable safe lost because a twenty-pound safe is a theft convenience. It comes with a cable, and cables get cut with a tool already in the thief's pocket.
Any fire safe that advertises protection without naming a test standard lost because a fire rating is a measured number: minutes and temperature. If the box will not tell you both, the word fireproof is decoration.
What this all costs
The real cost of home safe installation is not the safe. It is the second trip to the hardware store, the anchors you did not buy, and the afternoon you spend patching drywall because you cut before you measured.
Here is how I would budget it. The hidden wall unit and the freestanding fire-rated unit sit in different tiers, so check current Amazon price on both and pick the job you actually have. Add proper lag bolts, washers, and concrete anchors, a small line item that decides whether the safe stays put. Add a stud finder if you do not own one. Add a helper for anything above forty pounds, because a dropped safe dents a floor and a foot.
The labor is yours, and it is a weekend afternoon. If you would rather not cut drywall, a locksmith or safe installer will do the mounting, and that money buys the part that matters. The lock and the anchor are the security. The box is just the part you can see.
Measure first. Cut once. Anchor into wood, not drywall. Then change the factory code, test the backup key, and sleep better.